Origami Ornament Techniques: Tips for Success
I've been noticing lots of origami ornaments on Instagram lately... baubles that would be pretty displayed all year round depending on your paper choices. I was inspired to make three styles and would like to share tips I discovered along the way, as well as my favorite video ornament tutorials.


 Here they are shown resting on folded paper star printables via Oh My! Creative


1. Truth be told, whenever
I attempt a new origami project it usually takes several tries before
the folding pattern clicks. This geo ball was different... it wasn't the folding that gave me trouble, but the gluing together of the halves. Several attempts in, I finally felt like I wasn't all thumbs... yahoo!... worth the effort because they have such a beautiful shape.
Each ornament consists of two 4.5 inch (11.4 cm) squares of scrapbook paper. Gluing of the folded halves needs to be done with a light touch to
prevent compression. I recommend applying glue with a flat paintbrush to
get a thin,
smooth coating. Here's the trick: glue just one point at a time even though you'll be
tempted to do several at once... the phrase you can't rush a good thing truly applies here!
Scroll down to the third
ornament for instructions on attaching the bead and hanging cord.
To make the pointed tip at the bottom, I rolled a 1/8 inch (3.2 mm) x 6 inch (15 cm) strip of quilling paper on a quilling tool, glued the end, slipped it off the tool and gently pushed
out the center with the end of a paper piercing tool. A light coating of
glue applied inside the tip with the same tool holds the shape.

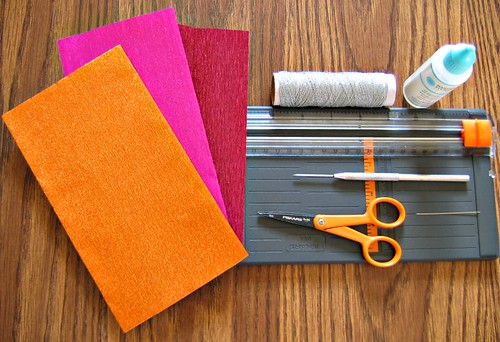
2. I used 5 inch (12.7 cm) squares of metallic crepe paper to make these ornaments whose shape reminds me of pockets. The last interlocking step was a little tricky, but watch the video enough times and you will meet with success. A hanging loop was made by piercing the two top points with a needle and inserting/tying a loop of fine ornament cord to hold them together.
Metallic crepe paper is beautiful stuff... shiny, vivid, and quite sturdy. Castle in the Air sells a sample pack that would be a great way to test the waters. Carte Fini in Italy also stocks metallic crepe paper.
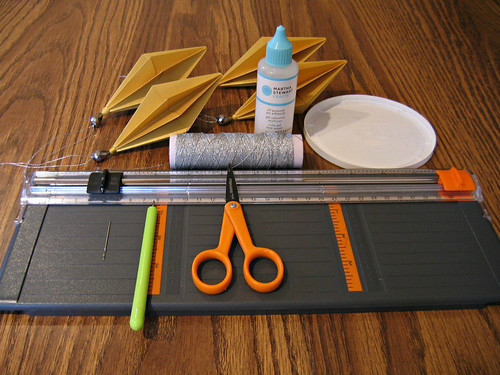
3. I think my favorite of the ornaments is this elongated triangle. The interlocking halves seem to magically snap into place and stay put without glue thanks to surface tension.

I used fairly heavy metallic gold paper (4.5 inch squares / 11.4 cm) and dressed up each ornament with a quilled dome and a faceted glass bead.
The dome was made with a 1/8 inch (3.2 mm) x 6 inch (15 cm) strip of the same metallic paper as the ornament. Use the same technique as for the pointed coil tip above (ornament 1), but instead of pushing out the center with a sharp tool, use a fingertip or rounded end of a dowel or crochet hook. Apply a coating of glue inside the dome to hold its shape.
To make a hanging loop, thread a needle with about 14 inches (35.5 cm) of two-ply fine ornament cord. Double
it and tie a few knots at the end. Pierce the tip of one folded paper half
from the inside and pull needle through until the knot
catches. With thread and needle dangling, assemble the two
ornament halves.
Slide the quilled coil onto the needle and glue it to the ornament top, making sure it is level. Then slide on a bead. Snip the needle off the cord close to the eye, and tie several taut knots at
the top of the bead to keep it from sliding freely on the loop. Lastly, tie a
single knot at the far end of the cord to create a loop. Trim
excess cord.
Happy ornament making!
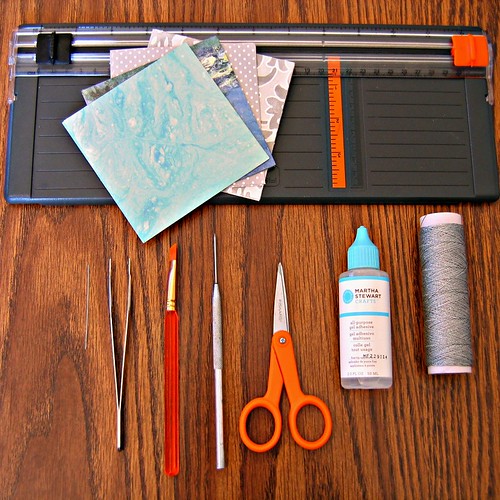
Quilling and paper craft supplies I recommend can be found in my Amazon shop.
Quilling and paper craft supplies I recommend can be found in my Amazon shop.