

Tools and Supplies:
Quilling paper - black with gold metallic edge, 1/8 inch (3mm) width, imported from JJ Quilling Design in England and available from most U.S. quilling suppliers. (it has a smooth, beautiful shine along one edge; also available in silver and copper) A package of thirty strips will be enough to make a whole school of fish... well, several at least. [edit: As of 2022, JJ Quilling has been sold, however, Quilled Creations now sells metallic edge strips in various colors.]
Quilling tool
Craft glue - I like to use clear gel glue, such as Scotch Glue
Ruler
Scissors
Tweezers - long ones with a fine tip
Glass head pin
Toothpick - to apply glue
Crimping tool - I use this one by Fiskars
Plastic lid - use as glue palette
Non-stick work board
Damp cloth - to keep fingers glue-free
Flat nose jewelry pliers - you'll need 2
Jump ring
Necklace cording or chain
Optional: I usually don't find it necessary to use a protective coating on paper pendants, but in a hot, humid climate you may want to apply a spray or brush-on matte fixative. Liquitex Matte Varnish is a good one.
All Things Paper is an Amazon affiliate. Additional quilling and paper craft supplies can be found in my Amazon shop.
Instructions:
The starfish arms are called wheat ears in quill-speak. They are made with a simple folding technique. You'll make five wheat ears with six loops each.
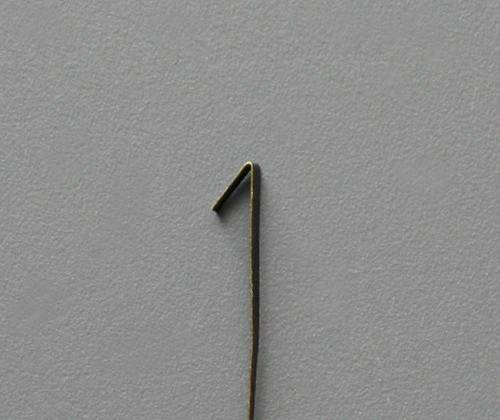
1. Begin a wheat ear by making a ¼ inch fold at one end of a 10 inch (approximate) strip.
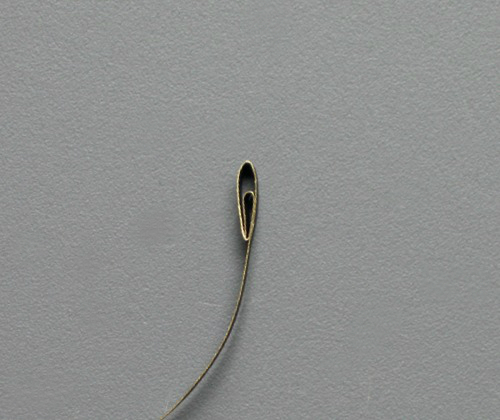
Each should be slightly larger (taller) than the previous loop. Gently shape the loops as you go to form a column.

3. Glue end and trim excess paper.
Gluing tip: When it comes to glue and quilling paper, less is more. I like to put a small dollop of glue on a plastic lid and dip from it with a toothpick or pin - this helps to control the amount.

5. Apply glue to one side of a crimped length and press it gently in place around a wheat ear. Trim excess. Repeat for each wheat ear.
6. Arrange wheat ears in a star shape and glue them together at center point. Bend tips slightly for a natural look.
7. Make the center coil: Cut a 4-inch strip of quilling paper in half lengthwise. Insert one end of the strip in quilling tool slot. Turn the tool with one hand while guiding the strip with the other. When the paper is fully wound, apply a bit of glue to the end, press in place, and slide coil off tool.
8. Gently press against underside of the tight coil with the ball of a glass-head pin. Apply a small amount glue inside the dome to preserve the shape, then glue it to the center of the starfish.
9. Reinforce pendant strength: Dot glue on the back at the center join spot. Allow glue to dry completely, preferably overnight.

11. Slide necklace cording or a chain through jump ring. Finis! Something new to wear today.

More sea creature ideas.

One more thing... Richela Fabian Morgan surprised me earlier in the week when she posted this photo of herself wearing a silver-edge black paper pendant I made for her a few years ago. (You might recall Richela's name from this grocery bag tote bag she designed for the All Things Paper book and her own series of Tape It & Make It duct tape books.) She said she tries not to wear it too often because she's really hard on her jewelry so I told her my all-time favorite paper jewelry tip... Last thing on, first thing off!


