
I noticed people have been searching the site for Christmas in July ideas and toilet paper roll projects. Well, my aim is to please, as my grandmother always liked to say.
Being a bit ahead of the game come December is a very good feeling...

...unlike me last year when I decided our tree needed a new star on the evening of the 23rd. Last minute Christmas crafting? Bring it on!
(hmm, I suppose it's more of a snowflake than a star, but either leads to the thought of making a batch to hang as window decorations... must keep saving those tp or paper towel rolls.)
What you'll need:
4 tp rolls or enough to provide a total of 30 half inch segments. For example, the ones I used measured 4 inches long so each roll provided eight segments.
Ruler
Pencil
Scissors
Glue - basic craft glue or a hot glue gun
Straight pins
Non-stick work surface (I used a Styrofoam tray)
Gold metallic acrylic paint and paint brush or gold spray paint
Additional paper craft supplies I recommend can be found in my Amazon shop.
Instructions:
Step 1: Flatten each tp roll and mark off 1/2 inch segments along both sides of its length. Cut across the roll using the marks as guidelines to make 30 pointed oval (marquise) segments.
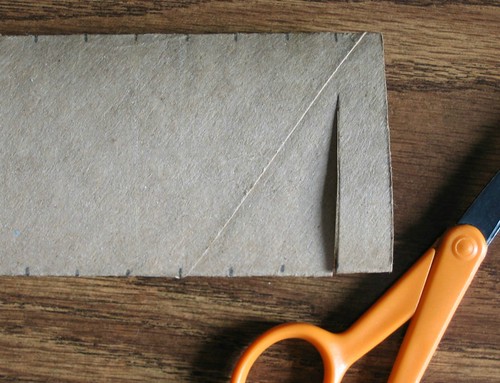
Step 2: Cut 6 of the segments into two unequal pieces so that the smaller section measures about 3/4 inch in length and the larger one about 1 1/2 inches. Each segment will have one folded end and one cut (open) end.
This is getting a little confusing... let's recap!
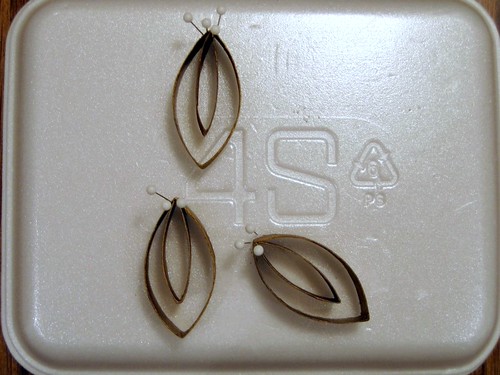
You now have three segment sizes:
6 of the 3/4" cut segments (small)
6 of the 1 1/2" cut segments (medium)
24 pointed oval segments (large)
Step 3: Brush or spray one or two coats of gold paint on all of the surfaces, inside and outside.
Step 4: To assemble the innermost section of the tree topper that looks like a flower with six small petals inside six larger petals, glue the open end of a medium loop inside one end of a large loop. It's easiest to do this on a non-stick surface. Hold the loops in place with straight pins while the glue dries.
When dry, assemble the "flower" and set it aside.
This is getting a little confusing... let's recap!
You now have three segment sizes:
6 of the 3/4" cut segments (small)
6 of the 1 1/2" cut segments (medium)
24 pointed oval segments (large)
Here's a photo so you can see the different segment sizes:


Step 3: Brush or spray one or two coats of gold paint on all of the surfaces, inside and outside.
Step 4: To assemble the innermost section of the tree topper that looks like a flower with six small petals inside six larger petals, glue the open end of a medium loop inside one end of a large loop. It's easiest to do this on a non-stick surface. Hold the loops in place with straight pins while the glue dries.
When dry, assemble the "flower" and set it aside.
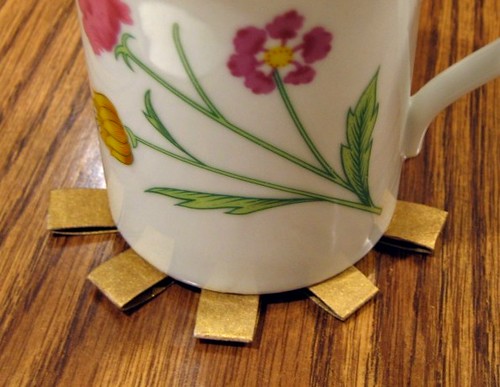
Step 5: Glue the open ends of the smallest segments and place them under a mug to weigh them down while the glue dries. Trust me, there are six. The last one is hiding on the other side of the mug.
Step 6: While these small segments are drying, arrange and glue six 3 petal arrangements that will form the outermost ring. Again, work with pins on a non-stick surface and allow the glue to dry. All this glue-waiting is important so the snowflake/star winds up with symmetrical diagonals. Make Mother Nature proud.
Step 7: Glue a three section segment to each of the central petal tips and then glue one of the smallest sections to each of the outermost ring sections.
Step 8: Touch up any missed spots with paint.
Step 8: Touch up any missed spots with paint.

It's so enjoyable to make something out of practically nothing.
And now I challenge you to say TP Tree Topper three times fast.
(It's the silly little things that keep me posting, ha!)
All Things Paper is an Amazon affiliate.


