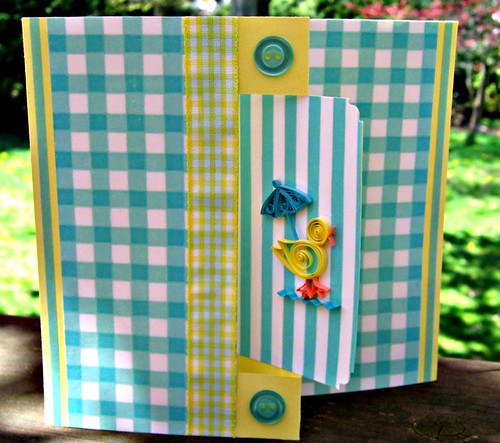
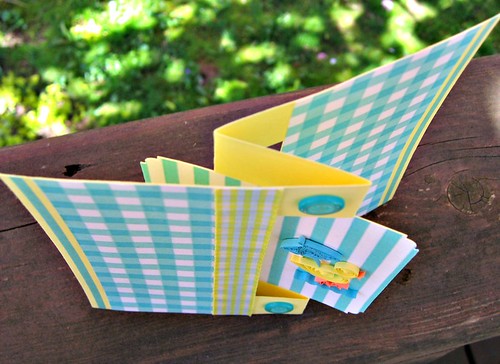
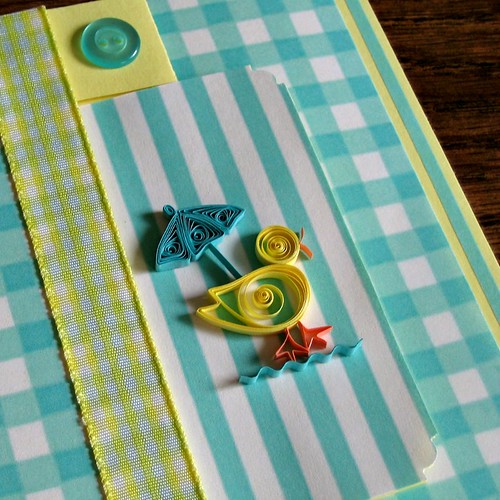
Speaking of showers, who can resist a cute duck? Always amazed that little bits of paper can take on personality, I can practically hear this fellow quacking a tune as he splashes along in the rain.
Trust me, the swing card looks much trickier to make than it is... it's cut from just one half of a sheet of cardstock. You'll find swing card instructions and a diagram on Beccy's Place. For the patterned paper, an image search brought up many printable papers.
If you need information about getting started quilling, you'll find the basics in my Quilling 101 post on Makezine. For those who already know how to quill, let's get to it:
Materials and Tools:
cardstock - pastel yellow
printable paper - 2, aqua/white, checks and stripes
ribbon - gingham, 6 inches
buttons - 2, 3/8 inch each
quilling paper - narrow, yellow, aqua, orange - 1/8 inch
aqua vellum strips - cut from vellum sheet
quilling tool - needle or slotted
glue - I like Scotch Clear Glue
glue stick or double-sided tape
small scissors
ruler
tweezers
paper piercing tool or glass-head pin - to apply glue
paper crimper
paper trimmer or craft knife and cutting edge
non-stick work surface
damp cloth - to keep fingers free of glue
Recommended quilling and paper craft supplies can be found in my Amazon shop.
Instructions:
Finished card measures 5 1/4 x 5 1/4 inches. Duck plus umbrella is 1 1/2 inches high.
1. Draw a swing card template on cardstock; cut along lines and fold.
a. Trace and apply printable papers with a glue stick or double-sided tape.
b. Use decorative edge scissors to cut a scallop at each corner of the center swing section.
c. Adhere ribbon with glue stick. Trim excess.
d. Adhere vellum side strips and buttons with glue.
2. Make umbrella handle and crimped water:
a. Stack and glue two 2 inch strips of aqua quilling paper.
b. When strip is completely dry, cut 3/8 inch to use as umbrella handle. Crimp remainder to use as water.
3. Create quilled components:
a. umbrella - 5 inch aqua shaped arrow, 6 inch aqua arrow, 5 inch aqua shaped
arrow - glue side by side
1 1/2 inch aqua oval tight coil
b. head - 5 inch yellow loose coil
c. beak- 3/8 inch orange, fold in half, curve ends
d. body - 12 inch yellow shaped loose coil
Roll loose coil; pinch to make teardrop point (tail feather). Hold point with thumb and index finger of right hand, use left hand to push rounded end toward point so coil begins to roll over right index finger. Pinch another point at this rolling section to create second tail feather.
e. foot (make 2) - 1 1/4 inch orange
Fold strip in half. Hold open ends between right thumb and index finger. With left thumb and index finger grasp fold and push toward right hand. At the same time, push toward fold with right hand. This forms a webbed foot. Glue open ends together and trim excess paper.
4. Assemble duckling and umbrella on workboard. Apply a thin layer of glue to back of quilling and place directly on card. Try not to slide it into place as this will leave a shiny trail of glue.
One last thing for today... the winner of a Kentucky Derby hat contest will be announced on the NBC Today show tomorrow morning.
I heard about it via Brittany Watson Jepsen of The House That Lars Built because she made this paper rose hat and was chosen as a finalist... is it any wonder with such a great photo?! Brittany is flying to New York for the show. Good luck to her!
Update: She won!


