This tutorial is specifically for the small snowflake shown above (diameter is 1 5/8 inches or 4.13cm), however, instructions are included so you will be able to make all of the designs in the top photo by referring to it for the number and placement of coils. These small snowflakes were made with shiny silver and gold edge quilling strips that are so convincingly metallic, they're ideal for creating jewelry.
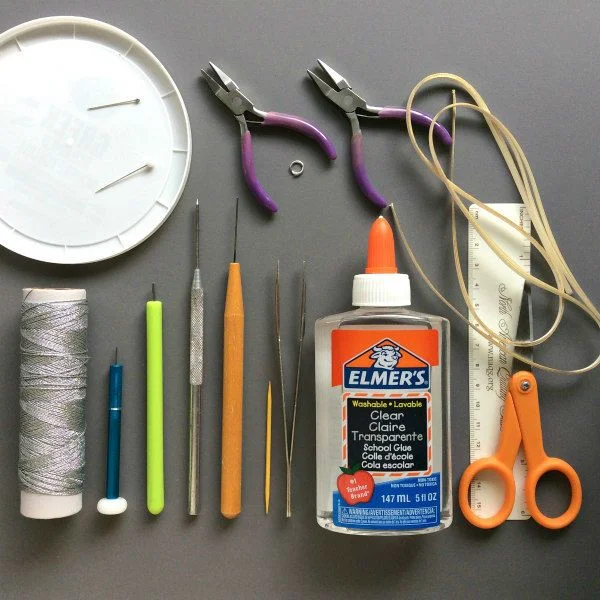
There is no need to buy specialty supplies to try your hand at quilling. The designs only require narrow strips that can be cut from a sheet of printer paper. Use a ruler and cocktail stick to score before cutting. You'll also need the cocktail stick to roll tight coils, as well as dowels in two sizes for other coil types, glue, scissors, tweezers, and a ball head pin - that's it!
 | |
| Quilling tools left to right: fine slotted tool, slotted tool, paper piercer, needle tool, cocktail stick |
Supplies:
- Quilling paper strips - plain or metallic edge, 1/8 inch (3mm) width, length varies by manufacturer, but one package is usually enough to make at least several snowflakes
- Quilling tool - needle or slotted, your choice
- White glue or clear acrylic gel
- Plastic lid - to use as glue palette
- Small scissors
- Ruler
- Large dowel - 3/8” (10mm) diameter
- Small dowel - 1/4" (6mm) diameter
- Ball head pin - to apply glue and shape tight coils
- Tweezers
- Wax paper or acrylic sheet - to protect work surface
- Damp cloth or paper towel - to keep fingers glue-free
- Fine metallic ornament cord
- Optional: paper piercer, cocktail stick, jump ring, jewelry pliers, necklace chain
Supply tip: Quilled Creations has a nice assortment of its own brand of metallic edge quilling strips.
Additional quilling supplies that I recommend can be found in my Amazon shop.
Good to know:
Dowels: I
used the handles of my needle quilling tool and paper piercer, but pens, knitting needles, crochet hooks, makeup brushes, wood dowels, etc. can be used as substitutes provided
they have a slick enough surface to allow a rolled coil to slide off
easily.
Gluing: My favorite method is to place a small dab of glue on a plastic lid, then dip from it with the tip of a pin as this controls the amount. Quilling requires far less glue than you might expect.
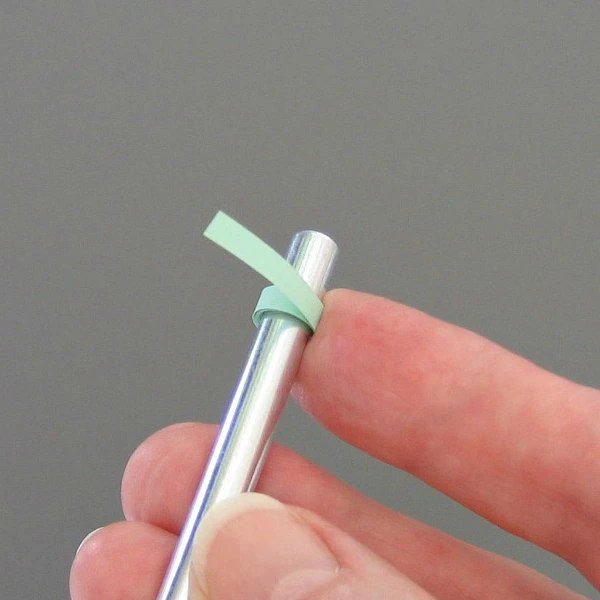
Rolling a strip on a dowel: Allow the starting end to show by angling it slightly so you can easily count rotations. This will give your coils a consistent thickness.
Tear strip ends before rolling a ring coil or tight coil because torn ends blend in best when glued for a smooth look. Use strips with blunt cut ends to make marquise and diamond coils.
 |
| Five basic shapes (marquise is shown in two sizes) |
Instructions:
1. Make the Center Ring Coil
a. Wrap a strip (approx 4.5 inches or 11.43cm) five times around a small dowel.
b. Tear off any excess strip without allowing the coil to expand and glue the end in place.
a. Wrap a strip (approx 6.5 inches or 16.52cm) five times around a large dowel
and slide the coil off without allowing it to expand.
b. Pinch the coil at opposite points, placing one of the pinch points where the initial strip end is located inside the coil as this will hide it.
3. Make Six Diamond Coils
a. Wrap a strip (approx 4.5 inches or 11.43cm ) five times around a small dowel and slide the coil off without allowing it to expand.
b. Pinch opposite points as for a marquise, then turn the marquise 90 degrees and pinch two more points to create a square.
c. Compress the square between your thumb and index finger to make a diamond shape.
d. Trim excess strip and glue the ends in place.
 |
| Pinching a ring coil to make a marquise. Turning it 90 degrees and making two more pinches creates a square that can be compressed slightly to form a diamond. |
a. Roll a 2-inch (5.08cm) strip on a quilling tool (or cocktail stick); don't allow it to relax.
b. Glue the end and slide the coil off the tool.
 |
| Rolling a tight coil on the tip of a paper piercer, a quilling needle or slotted tool substitute. |
Optional:
1. Use tweezers to compress a tight coil to make an oval tight coil.
2. For a dimensional look, curve the top of a tight coil by pressing the ball head of a pin against one flat side to create a dome. Apply a small amount of glue inside the coil to preserve its shape.
2. For a dimensional look, curve the top of a tight coil by pressing the ball head of a pin against one flat side to create a dome. Apply a small amount of glue inside the coil to preserve its shape.
 |
| Gold, silver, and turquoise snowflakes have domed tight coils, hot pink has oval tight coils, and white has plain tight coils. |
5. Assemble the Snowflake
Tip: For the neatest look, hide a coil's glued end
by butting it up against another coil.
a. Handling the coils with tweezers, glue each marquise
to the center ring coil, evenly spacing them around it.
b. Glue a diamond between each marquise so that the side points of the diamond touch the side midpoints of the marquises.
c. Glue a tight coil to the tip of each diamond.
d. Turn the snowflake over and apply tiny dots of glue at each join as reinforcement.
e. Thread about eight inches of fine metallic cord through one of the marquises and tie a hanging loop.
To make the green teardrop coils, see this tutorial.
Tip: If you choose to wear your snowflake as a pendant, treat it
as you would any fine jewelry... last thing on, first thing off, and
store it in a safe, dry place.
All Things Paper is an Amazon and AWIN affiliate.
I will receive a tiny commission at no additional cost to you.


